

What Is the Correct Way to Install a Handwheel Gate Valve in a Horizontal Pipeline
2026-08-24
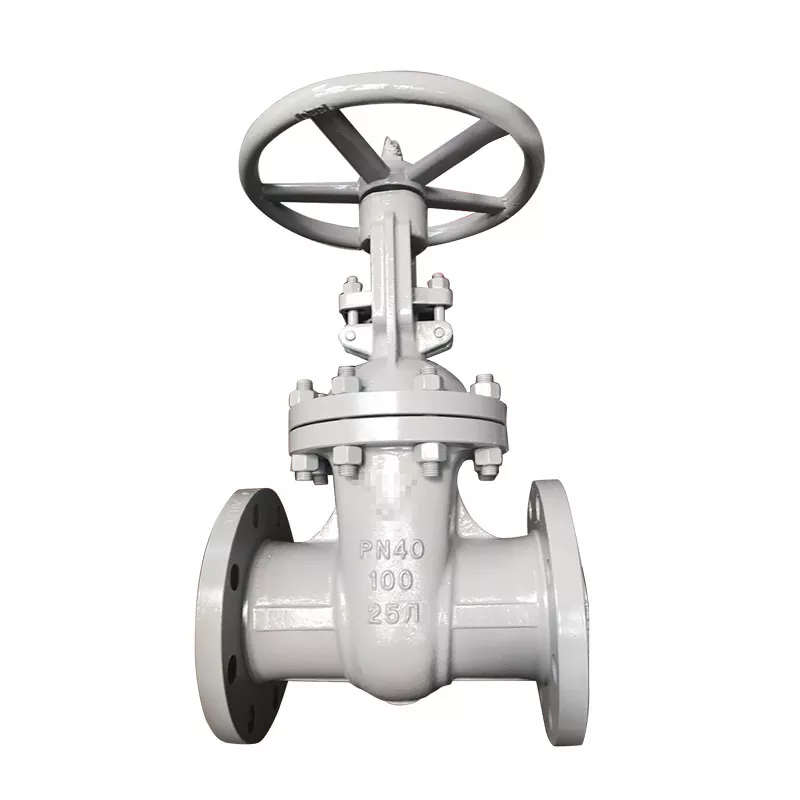
Installing a industrial valve in a piping system might seem straightforward, but getting it wrong with a Handwheel Gate Valve can lead to leaks, premature wear, or even catastrophic failure. For over a decade, Hanno has supplied precision-engineered Handwheel Gate Valves to oil, water, and chemical plants worldwide, and we have seen every installation mistake possible. The truth is, correct installation is not just about tightening bolts—it is about orientation, clearance, torque control, and post-installation verification. This guide walks through the entire procedure step by step, so your valve performs as designed for its full service life.
Pre-Installation Checklist (Do Not Skip)
Before any wrench touches the valve, complete these five checks. Missing any one of them is the number one cause of early field failures.
| Check Point | Action Required | Acceptance Criterion |
|---|---|---|
| Valve Data Tag | Verify model, size, pressure class, and material. | Matches pipeline specification (e.g., 150# or 300#). |
| End Protection | Remove plastic end caps and inspect sealing faces. | No scratches, dents, or rust on flange faces or threaded ends. |
| Internal Cleanliness | Rotate handwheel fully open and closed to dislodge shipping debris. | Smooth operation with no grinding feel. |
| Gasket & Bolts | Check gasket type (RTJ, spiral-wound, or flat) and bolt grade. | Gasket matches flange rating; bolts are ASTM A193 or equivalent. |
| Flow Direction Arrow | Locate the cast arrow on the valve body. | Arrow must point downstream when installed. |
Pro Tip from Hanno: Always keep the Handwheel Gate Valve in the fully closed position during hoisting and bolting. This protects the disc and seat from accidental impact damage.
Step-by-Step Installation Procedure for Horizontal Piping
Horizontal lines are the most common application, but they also carry the highest risk of sediment buildup and stem binding if installed incorrectly.
Step 1 – Orient the Valve Correctly
For a horizontal pipeline, the Handwheel Gate Valve must be installed with the stem vertical (pointing upward) or at a maximum 45° angle from vertical. Never install it with the stem pointing downward—this allows debris to collect inside the bonnet and accelerates packing wear. Hanno designs its bonnet cavity to self-drain, but this only works when the stem is on top.
Step 2 – Align Flanges or Threads Without Forcing
If flanged, bring the two pipe flanges together with the valve between them. Insert all bolts finger-tight first. Do not use the bolts to pull misaligned flanges into place—this creates bending stress on the valve body. For threaded ends, apply a suitable pipe dope or PTFE tape, and screw the valve in by hand for at least three full turns before using a wrench.
Step 3 – Tighten Bolts in a Star Pattern
Use a calibrated torque wrench. Tighten in three passes:
-
Pass 1: 30% of final torque
-
Pass 2: 70% of final torque
-
Pass 3: 100% of final torque
Follow the sequence shown below (for a 4‑bolt flange):
| Bolt Position | 1st Pass | 2nd Pass | Final Pass |
|---|---|---|---|
| Top-Left → Bottom-Right | 30% | 70% | 100% |
| Top-Right → Bottom-Left | 30% | 70% | 100% |
| Top-Center → Bottom-Center | 30% | 70% | 100% |
| (Repeat all) | Re-check | Re-check | Final verify |
Step 4 – Leave the Valve Slightly Open During Pressure Test
After installation, crack the Handwheel Gate Valve open by about 10% of full travel. This prevents the disc from jamming against the seat when hydraulic pressure surges during the line test. Once the test is complete, close it fully and then open it one-quarter turn to prevent seat galling.
Post-Installation Verification
After pressurizing the line, perform these three verifications:
-
Packing Leak Test: With the valve fully closed, check the stem packing nut for any weeping. If leakage occurs, tighten the packing gland nuts evenly—but never exceed 1/8 turn at a time.
-
Handwheel Torque Check: The handwheel should turn smoothly with normal two‑hand force. If it feels excessively hard, the pipeline may be misaligned or the disc may be scraping the body guide ribs.
-
Cycle Test: Open and close the valve fully twice, recording the number of turns. This confirms the stem threads are clean and the stop mechanism is functioning.
Frequently Asked Questions About Handwheel Gate Valves
Q1: Can a Handwheel Gate Valve be installed in a vertical pipeline with flow upward?
A1: Yes, but with a critical restriction. Hanno recommends using a non-rising stem design for vertical upward flow to avoid stem buckling. For rising-stem models, ensure the pipeline has enough overhead clearance for the stem to travel fully upward. Also, never install a gate valve in vertical downward flow—the disc weight can cause it to slam shut, damaging the seat. Always consult the valve’s IOM (Installation, Operation, Maintenance) manual for your specific model.
Q2: How tight should the packing gland be on a Handwheel Gate Valve after installation?
A2: The packing should be snug enough to prevent leakage but not so tight that the handwheel becomes stiff. As a rule from Hanno’s field team: tighten the gland nuts evenly until you feel resistance, then perform a “finger-tight + ¼ turn” method on each nut. Then, cycle the valve fully open and closed. If the handwheel turns freely and there is no weeping at 1.5× operating pressure, the packing is correctly set. Re-check after 24 hours of service, as packing settles.
Q3: What is the recommended clear space around a Handwheel Gate Valve for maintenance?
A3: You need at least 300 mm (12 inches) of clearance above the handwheel for full stem travel and wrench access. On the sides, maintain 600 mm (24 inches) to allow a worker to stand comfortably and use a cheater bar if needed. For motorized or gear‑operated versions, double that side clearance. Hanno also advises leaving a drain pan access area beneath the valve in case of future bonnet gasket replacement—this is often forgotten and causes costly downtime later.
Common Mistakes to Avoid
-
Overtightening flange bolts – distorts the valve body and causes internal binding.
-
Using the handwheel as a lifting point – this bends the stem. Always use slings around the body.
-
Installing without a strainer upstream – debris will score the seat surface within weeks.
-
Closing the valve with excessive force – gate valves are not torque‑to‑seat; they are position‑seated. Stop when the handwheel stops.
Why Choose Hanno for Your Handwheel Gate Valve Needs
Hanno manufactures each Handwheel Gate Valve with ASTM-compliant materials, double‑guided discs, and precision‑machined packing chambers. Every unit is hydrostatically tested before shipment. Our technical team provides site‑specific installation drawings and torque tables free of charge—because we believe that a valve is only as good as its installation.
Ready to Install with Confidence?
Proper installation extends valve life by 3‑5 times and reduces unplanned shutdowns. If you need model‑specific torque charts, custom flange facing, or on‑site training for your crew, contact us today. Our engineers are available for video calls, site visits, and emergency technical support.