

How to Properly Install a Gate Valve to Ensure Optimal Pipeline Performance?
2026-09-08
Over 40 percent of gate valve field failures can be traced back to the installation process, not the valve itself. A Gate Valve that is perfectly manufactured can fail prematurely if it is installed with incorrect flange alignment, improper bolt torque, or the wrong orientation. This guide is written for the person who actually installs the valve—the pipeline fitter, the maintenance engineer, the contractor on site. It assumes you already know what a Gate Valve does, and instead focuses on how to install it correctly the first time.
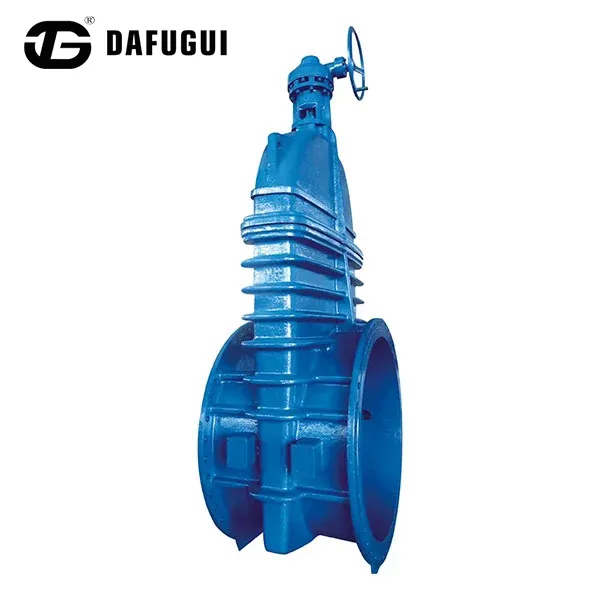
1. What Should You Check Before Lifting the Gate Valve Into Position?
Installation begins before the valve is lifted. The first step is to verify that the Gate Valve matches the pipeline specification. Check the pressure rating (PN or Class), the end connection type (flanged, threaded, or welded), and the material compatibility with the fluid. In our factory, we stamp the body of every Gate Valve with the material grade, pressure rating, and size. This information should match the pipeline drawing. The second step is to inspect the valve for shipping damage. Look for dents on the body, damage to the flange faces, and any foreign material inside the valve. The third step is to verify that the flange faces on the pipe and the valve are clean and free of defects. A burr or scratch on the flange face can cause a leak that no amount of bolt tightening will fix. In our experience, the most common installation error is failing to inspect the valve before installation, only to find after it is bolted in that the flange faces are damaged.
Critical step: Do not remove the protective covers from the flange faces until the valve is ready to be bolted. Keeping the covers in place prevents contamination from entering the valve during handling.
At Dafugui Pipe Valve Co., Ltd., we ship every Gate Valve with protective flange covers and a detailed installation card. The card lists the recommended bolt size, torque value, and gasket type for the specific valve.
2. What Is the Correct Orientation for Installing a Gate Valve?
Orientation is one of the most misunderstood aspects of Gate Valve installation. A Gate Valve can be installed in any orientation—horizontal, vertical, or at an angle—but there are practical considerations for each. In a horizontal pipeline, the stem should be oriented vertically upward. This allows the bonnet to be accessible for maintenance and ensures that debris does not settle in the bonnet area. In a vertical pipeline, the stem can be horizontal, but the valve should be installed so that the stem does not point downward. A downward pointing stem can trap condensate and cause corrosion. In buried applications, the valve should be installed with the stem vertical and accessible through a valve box. The table below summarizes the orientation recommendations for different installation scenarios.
| Pipeline orientation | Recommended stem orientation | Reason | Exception |
| Horizontal pipe | Stem vertical, pointed up | Bonnet access, debris prevention | Space constraints (allow horizontal with offset) |
| Vertical pipe (upward flow) | Stem horizontal or angled up | Prevents water hammer on disc | If flow is downward, install with stem horizontal |
| Vertical pipe (downward flow) | Stem horizontal | Prevents debris from settling on disc | Stem should never point down |
| Buried installation | Stem vertical, pointed up | Valve box access, extension stem required | Must have access for operation |
In our factory, we have seen valves installed upside down, with the stem pointing downward, because the installer assumed that the flow direction arrow was the only thing that mattered. The flow direction arrow indicates the direction of flow through the valve, not the orientation of the stem. The stem orientation is a separate consideration.
3. How Should Flange Bolts Be Torqued to Ensure a Leak-Free Joint?
The bolted flange connection is the most common leak path in a Gate Valve installation. Proper bolt tightening is a multi-step process. The first step is to lubricate the bolts and nuts with an anti-seize compound. This ensures that the torque you apply is actually creating the desired bolt tension, rather than overcoming friction. The second step is to tighten the bolts in a star pattern (also called a cross pattern). This ensures that the flange is pulled together evenly, preventing gasket distortion. The third step is to apply torque in three passes: first to 30 percent of the final torque, then to 60 percent, then to 100 percent. The table below provides the recommended final torque values for common bolt sizes and pressure classes.
| Bolt diameter (mm) | Bolt grade | Recommended torque (Nm) – Class 150 | Recommended torque (Nm) – Class 300 |
| M16 | 8.8 | 120 – 140 | 140 – 160 |
| M20 | 8.8 | 230 – 270 | 270 – 310 |
| M24 | 8.8 | 380 – 430 | 430 – 490 |
| M27 | 8.8 | 550 – 620 | 620 – 700 |
| M30 | 8.8 | 780 – 880 | 880 – 990 |
The torque values are approximate and depend on the condition of the threads and the lubricant used. In our factory, we recommend using a calibrated torque wrench and verifying the torque after 24 hours, as the bolts may relax after the initial tightening. For critical applications, we recommend using a hydraulic torque wrench for consistent tensioning.
4. What Post-Installation Tests Should Be Performed Before Commissioning?
After the Gate Valve is installed, there are three tests that should be performed before the pipeline is put into service. The first is a visual inspection of the bonnet and stem seals to ensure that there are no visible leaks. The second is a hydrostatic test of the valve at 1.5 times the maximum operating pressure, with the valve in the closed position to test the seat seal. The third is a functional test of the valve, operating it from fully open to fully closed and back to fully open to ensure that the stem moves smoothly and the valve seals properly. In our factory, we recommend keeping the valve slightly cracked during the hydrostatic test to avoid trapping debris under the gate.
Frequently Asked Questions About Gate Valve Installation
Summary for Pipeline Installers and Supervisors
A Gate Valve is a precision component that must be installed with care. The installation process involves pre-installation inspection, proper orientation, correct bolt tightening, and post-installation testing. Each step is critical to the long-term performance of the valve. A valve that is installed correctly will provide decades of reliable service. A valve that is installed poorly will fail prematurely, often at the most inconvenient time. Our factory has been manufacturing Gate Valve units for over 18 years, and we have seen the full range of installation errors and their consequences. We provide technical support to help our customers avoid these errors.
Dafugui Pipe Valve Co., Ltd. manufactures Gate Valve units with clear installation markings, including flow direction arrows, size markings, and torque specifications. We provide detailed installation instructions and technical support for all our products.